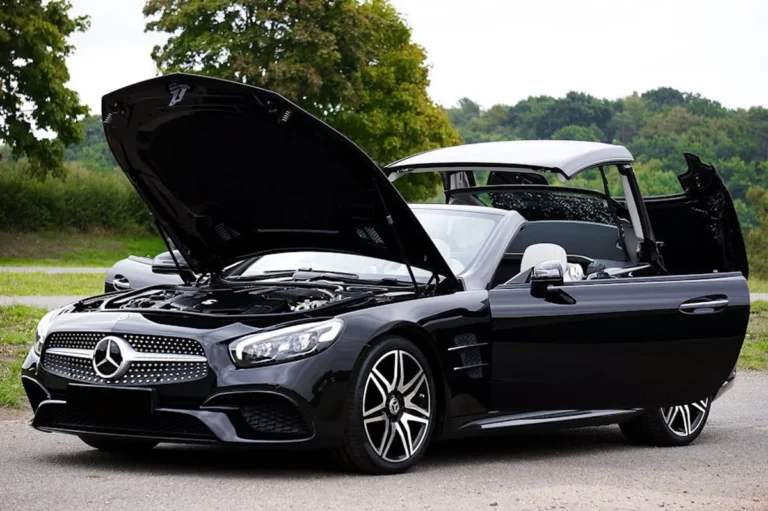

The visual presentation of a car listing directly influences buyer perception and, critically, transaction speed. High-quality photography isn't merely an aesthetic choice; it's a strategic commercial decision that can differentiate a listing in a crowded market, command a higher asking price, and reduce the time a vehicle spends on the market. Buyers scrolling through hundreds of options online often make snap judgments based solely on images. A poorly lit, out-of-focus, or incomplete photo set can deter serious inquiries, signaling a lack of care or transparency from the seller. Conversely, a well-executed photo series builds immediate trust, highlights key selling points, and encourages potential buyers to take the next step.
Strategic Preparation for Your Car Shoot
Effective car photography begins long before the camera comes out. The goal is to present the vehicle in its most appealing and honest light. Start by thoroughly cleaning the car, inside and out. This includes washing, waxing, vacuuming, and wiping down all interior surfaces. Remove personal items, clutter, and any temporary accessories. Pay attention to tires, wheels, and glass, as these often reflect light and can highlight dirt. Choose a clean, uncluttered background that doesn't distract from the car itself. An open, neutral space like a quiet parking lot, a clear driveway, or a professional studio is ideal. Avoid busy streets, cluttered garages, or backgrounds with strong, competing colors or patterns.
Timing is crucial for optimal lighting. The "golden hours" – early morning or late afternoon – provide soft, diffused light that minimizes harsh shadows and reflections, enhancing the car's contours and paint finish. Overcast days also offer excellent, even lighting. Avoid direct midday sun, which creates harsh glares and deep shadows that obscure details and make the car appear less appealing. Position the car to ensure the sun illuminates the side you are photographing, avoiding direct light into the camera lens, which can cause lens flare and reduce image clarity.
Capturing the Vehicle's Full Story: Essential Angles
A comprehensive photo set tells a complete story, addressing buyer questions before they're asked. Aim for a minimum of 20-30 high-resolution images, covering all critical aspects. Begin with exterior shots from multiple angles:
- Front Three-Quarter Angle: Position the camera to capture the front and one side, showcasing the car's overall stance and design. Shoot from a slightly lower angle than eye level to give the car a more commanding presence.
- Rear Three-Quarter Angle: Mirror the front shot, capturing the rear and the opposite side.
- Direct Front and Rear: Straight-on shots are essential for highlighting the grille, headlights, taillights, and badging.
- Profile Shots: Capture both sides of the car directly to show its length and lines.
- Wheel and Tire Details: Close-ups of all four wheels, showing tire tread depth (if significant), wheel condition, and brake calipers (if a selling point).
- Engine Bay: A clean, well-lit shot of the engine bay indicates a well-maintained vehicle.
- Trunk/Cargo Area: Show the capacity and condition, including any spare tire or tools.
For the interior, focus on key areas:
- Dashboard Overview: A wide shot capturing the entire dashboard, steering wheel, and instrument cluster. Ensure the steering wheel is straight.
- Front Seats: Capture both front seats, highlighting upholstery condition, controls, and legroom.
- Rear Seats: Show the condition and space in the back.
- Center Console: Detail the infotainment system, gear selector, and climate controls.
- Specific Features: Close-ups of unique features like sunroof controls, premium sound system components, or advanced driver-assistance system buttons.
Technical Considerations for Impactful Images
While professional cameras offer greater control, modern smartphones are capable of producing excellent results if used correctly. Regardless of equipment, focus on these technical aspects:
Resolution: Always shoot at the highest possible resolution. This allows for cropping and ensures clarity when buyers zoom in on details.
Focus: Ensure the car is sharply in focus. Tap on the car's surface (on a smartphone) or use autofocus points (on a camera) to achieve this. A blurred image immediately diminishes perceived quality.
Exposure: The image should be neither too dark (underexposed) nor too bright (overexposed). Adjust exposure compensation if needed to ensure details in both shadows and highlights are visible. Avoid using flash, which creates harsh, unnatural lighting and reflections.
Stability: Use a tripod or brace yourself against a stable object to prevent camera shake, especially in lower light conditions. Sharpness is paramount.
Consistency: Maintain a consistent shooting height and angle for similar shots (e.g., all exterior three-quarter shots from the same perspective). This creates a cohesive and professional-looking gallery.
Pro Tip: Always include clear, well-lit photos of any significant damage, wear, or imperfections. Transparency builds buyer trust immediately, reduces wasted time on inquiries from buyers who feel misled, and prevents negative feedback or disputes later. Frame these honestly, but don't make them the first or most prominent images.
Optimizing Your Photo Set for Online Listings
Once you have your raw images, a few steps ensure they are ready for prime time. Basic editing can significantly enhance the final product. Adjust brightness, contrast, and white balance to make colors pop and ensure accurate representation. Crop images to remove distracting elements and straighten horizons. Avoid heavy filters or excessive manipulation that can make the car look unnatural or misleading. The goal is to enhance, not distort.
Order your photos logically. Start with the most appealing exterior shots (front three-quarter), followed by other exterior angles, then move to the interior, engine bay, trunk, and finally, any specific features or imperfections. This guided tour allows buyers to mentally walk around and through the car. Ensure all images are correctly oriented and sized according to the listing platform's requirements. High-quality, properly sequenced photos are the most powerful tool for attracting serious buyers and achieving your desired sale.
Driving Inquiries with Superior Imagery
Investing time in high-quality car listing photography directly translates into commercial advantage. Professional-grade images capture attention, convey value, and build confidence in potential buyers. Listings with superior visuals consistently generate more clicks, more inquiries, and ultimately, faster sales at better prices. By following these practical steps, you transform a simple listing into a compelling visual presentation that effectively communicates the vehicle's condition and appeal, driving tangible results for sellers.
Frequently Asked Questions About Car Listing Photos
How many photos should I include in a car listing?
Aim for a minimum of 20-30 high-quality photos. This allows you to cover all essential exterior, interior, and detail shots, providing a comprehensive view for potential buyers.
What is the best time of day to photograph a car?
The "golden hours" – early morning (shortly after sunrise) or late afternoon (before sunset) – provide soft, diffused light that minimizes harsh shadows and reflections. Overcast days also offer excellent, even lighting.
Should I use my smartphone or a professional camera?
Modern smartphones are capable of producing excellent results if used correctly, especially for online listings. The key is good lighting, steady hands, and attention to detail. Professional cameras offer more control and higher fidelity, but are not strictly necessary for compelling online photos.
Is it okay to show imperfections in the photos?
Yes, it is highly recommended to include clear, well-lit photos of any significant damage or wear. Transparency builds trust with buyers, minimizes misunderstandings, and helps qualify serious inquiries, leading to a smoother transaction process.